Workflow Groups - New User Setup Guide
This guide will show how to create a new user and set them up into Workflow Groups.
Note: Only Line of Business and Professional Users are allowed to create a new user
How to Create a New User
- First head over to Reference > Personnel.
- You will see a list of existing users showing their Name, Person Code, User Type and Login ID.
- To create a new user, click Create New.
| 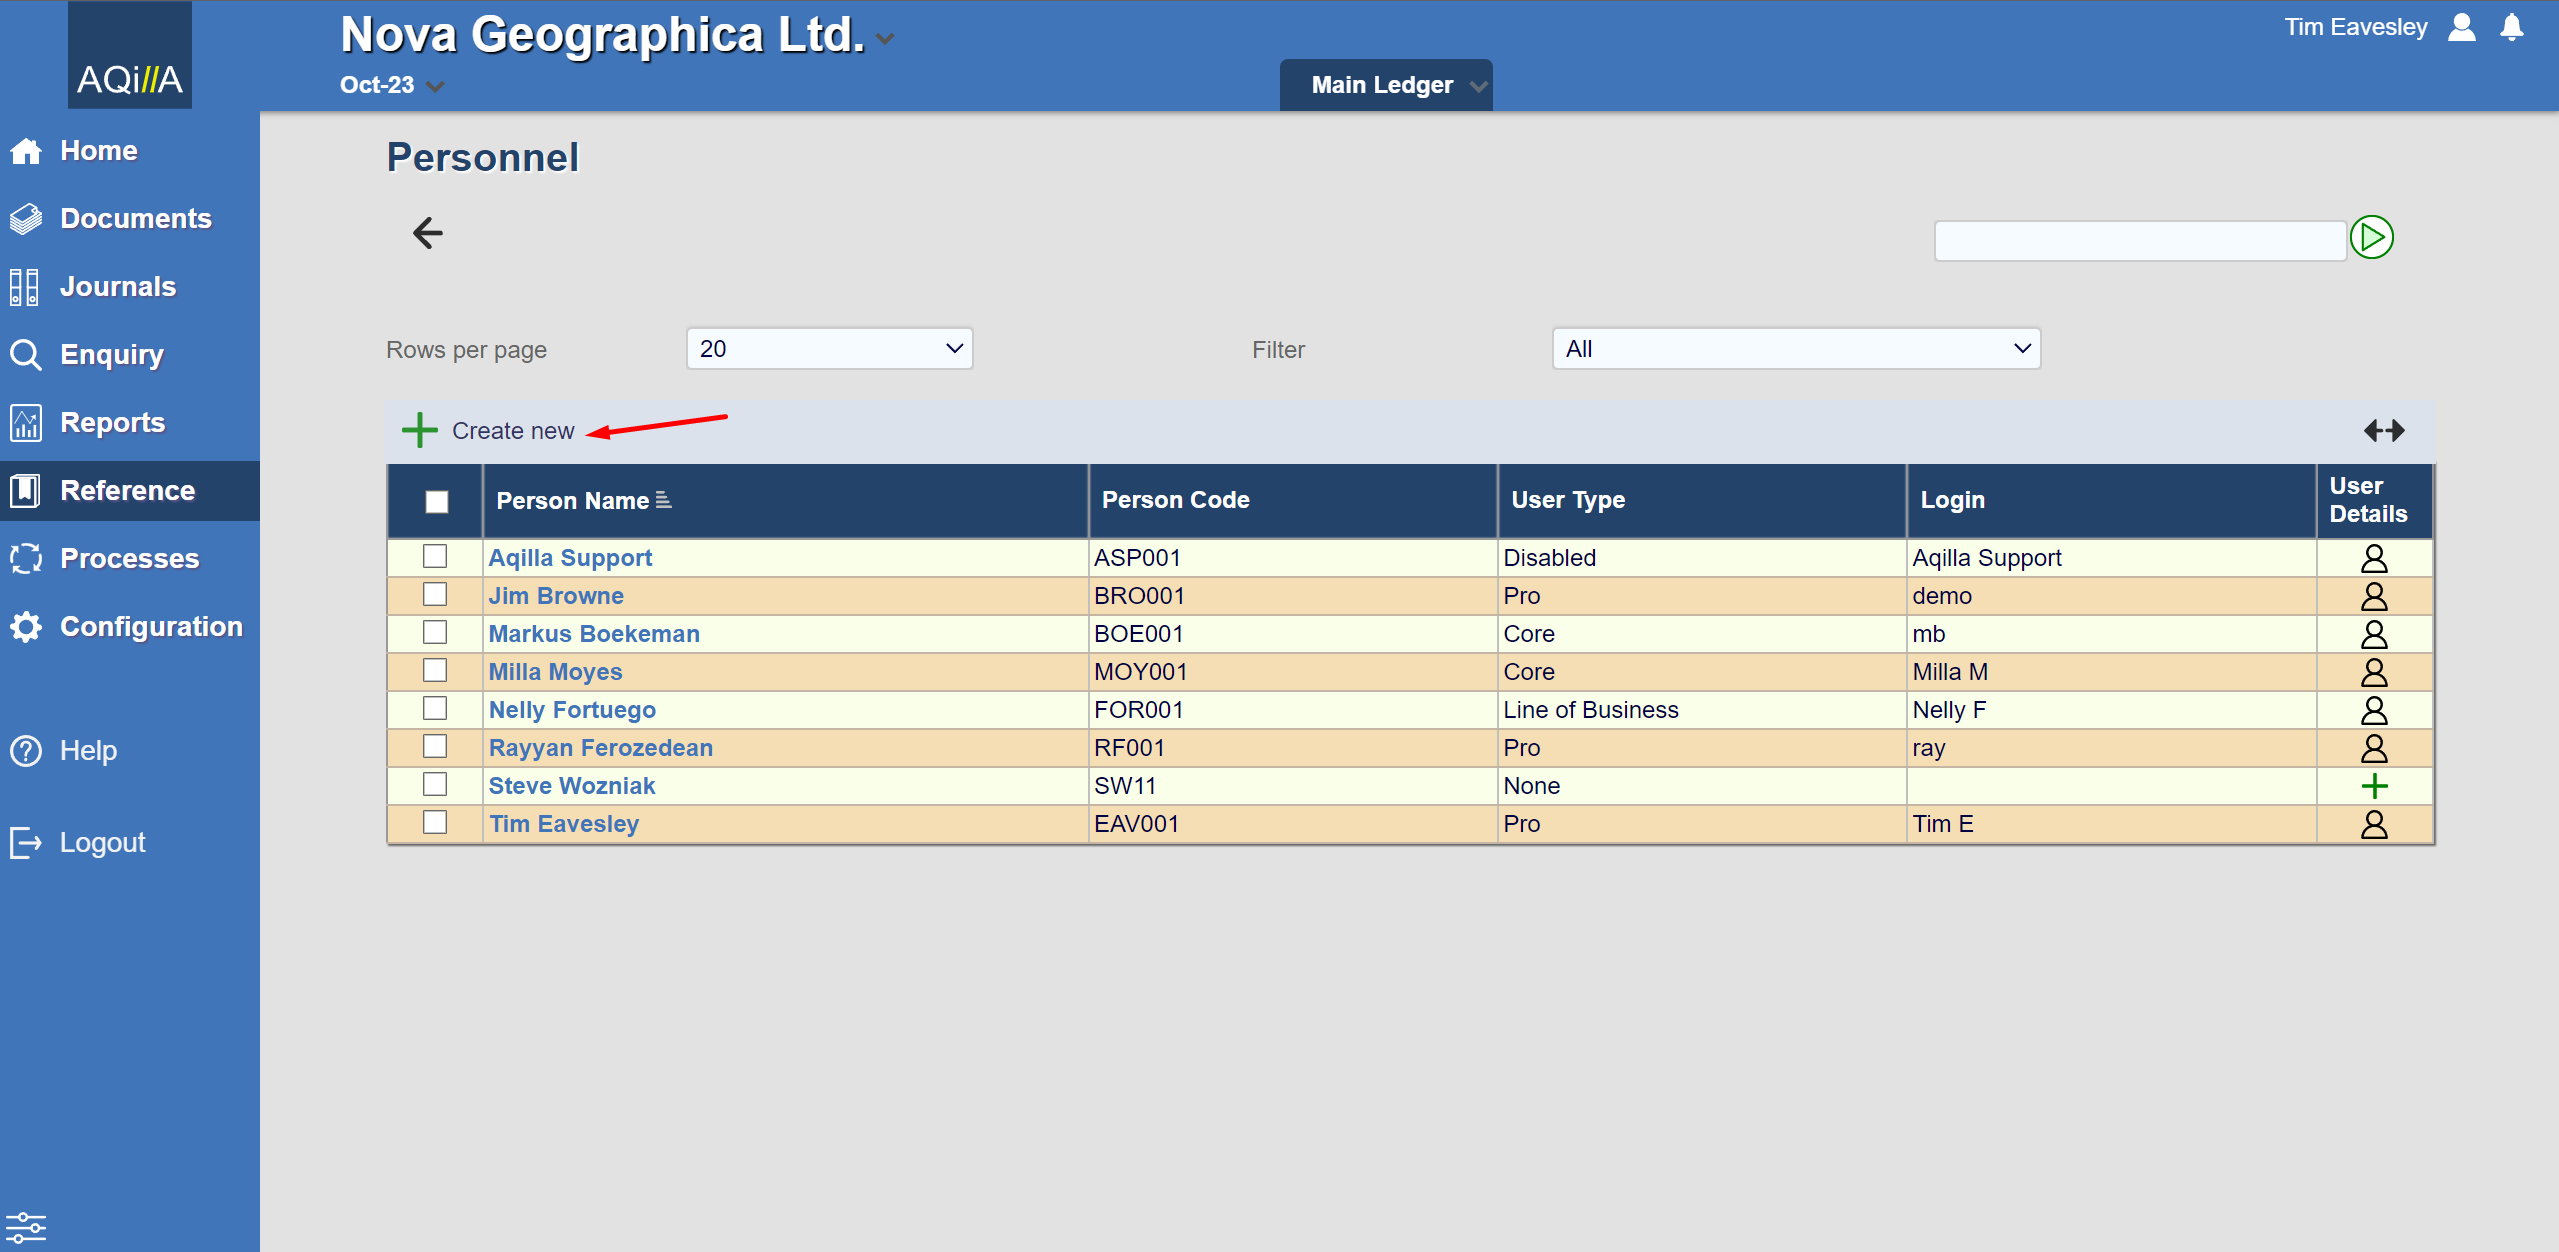 |
|---|
- You will be presented the Person Edit Page
- Here you can fill in the details of the new user.
- The fields highlighted in Red are mandatory to fill in:
- Person Name
- Email
- Person Code
- The Account field in Yellow is not mandatory but can be used to link the user to a Creditor Account (which they can create).
- Once the details are filled in, click the green tick to save. The new user has now been added to Aqilla.
| |
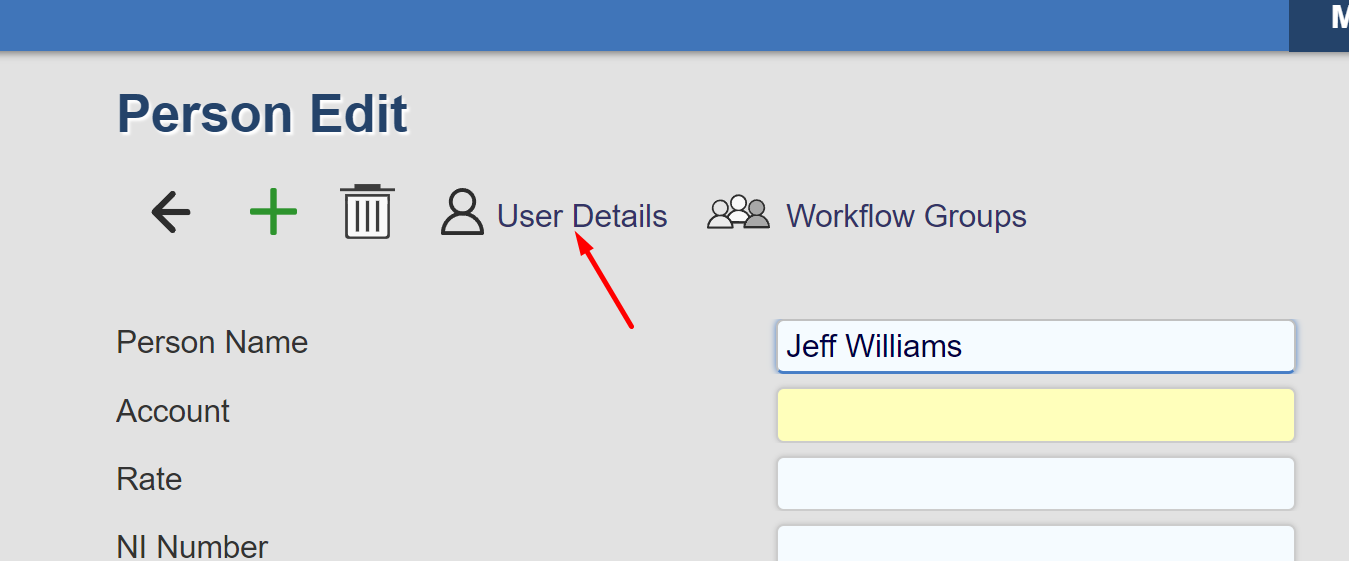
- Now the Login Credentials need to be set up.
- At the top of the Person Edit Page, click on User Details.
| |
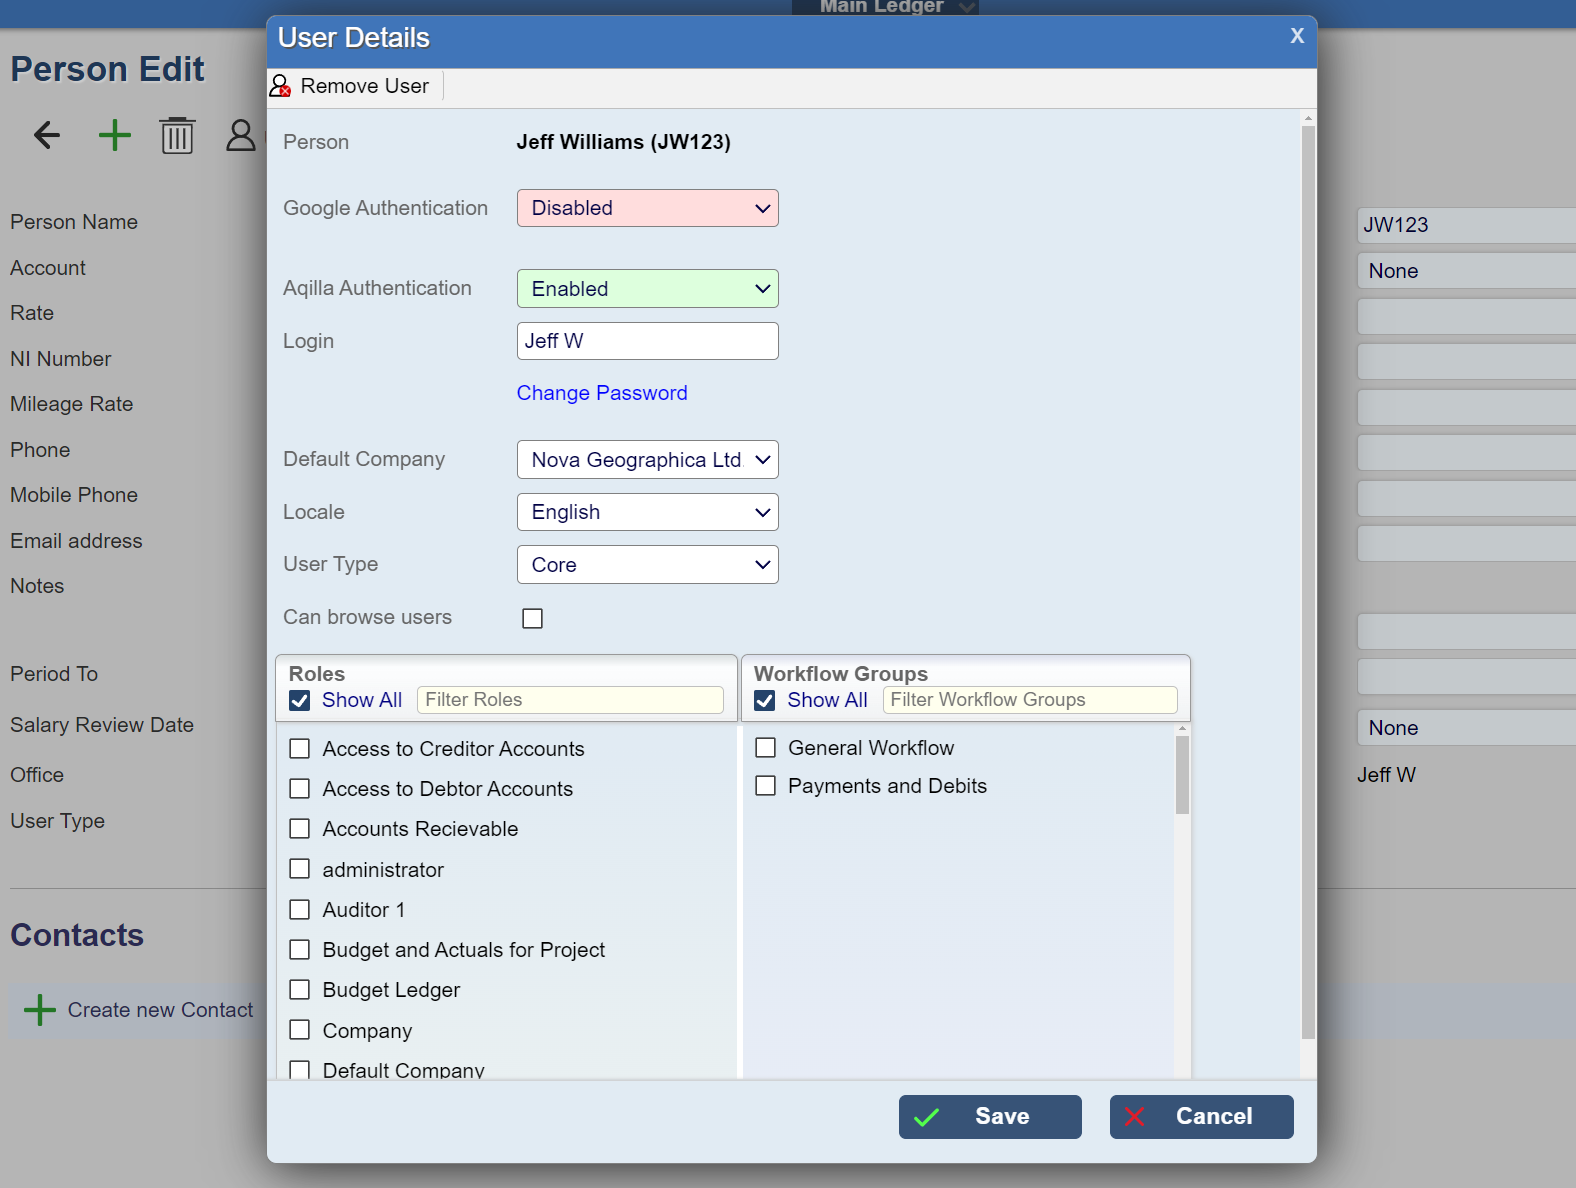
- A User Details window will pop up.
- Here you want to fill out:
- Login (a username of your choosing)
- Password (a strong memorable password)
- Default Company (If you have a multi-company instance, you can choose which main company appears when you log in.)
- Locale (Language, self explanatory.)
User Type (This is crucial; consult with your account manager before selecting a user type; billing fees vary depending on user type)
(As illustrated in the screenshot, creating a new Core User is an example of this.)
| |
- Depending on the user type you've chosen, you will have to select the Roles in order for the user to have any access or use on the system.
- Click Show All to show all the roles you can enable for the user on the system.
- The main roles that need to be enabled for the user to have the basic functionality on the system would be:
- Company (To view the company and its details)
- Default Company (To view the default/main company in the instance)
- Main Ledger (To have access to the ledger and the transactions)
- User (Do not disable this, otherwise the user is unable do anything when logged in)
| |
- You can also add the new User to Workflow Groups. The next section below will show how to enable this functionality.
| |
How to add and give permissions to New User in Workflow Groups
Workflow Groups can allow flexibility in the permissions and what documents users can access and create.
An example will be used in this step by step guide:
Example: What if you want to give permission to a new user to have access to Purchase Invoices and Purchase Order documents?
- Professional User: Tim
- New Core User: Milla
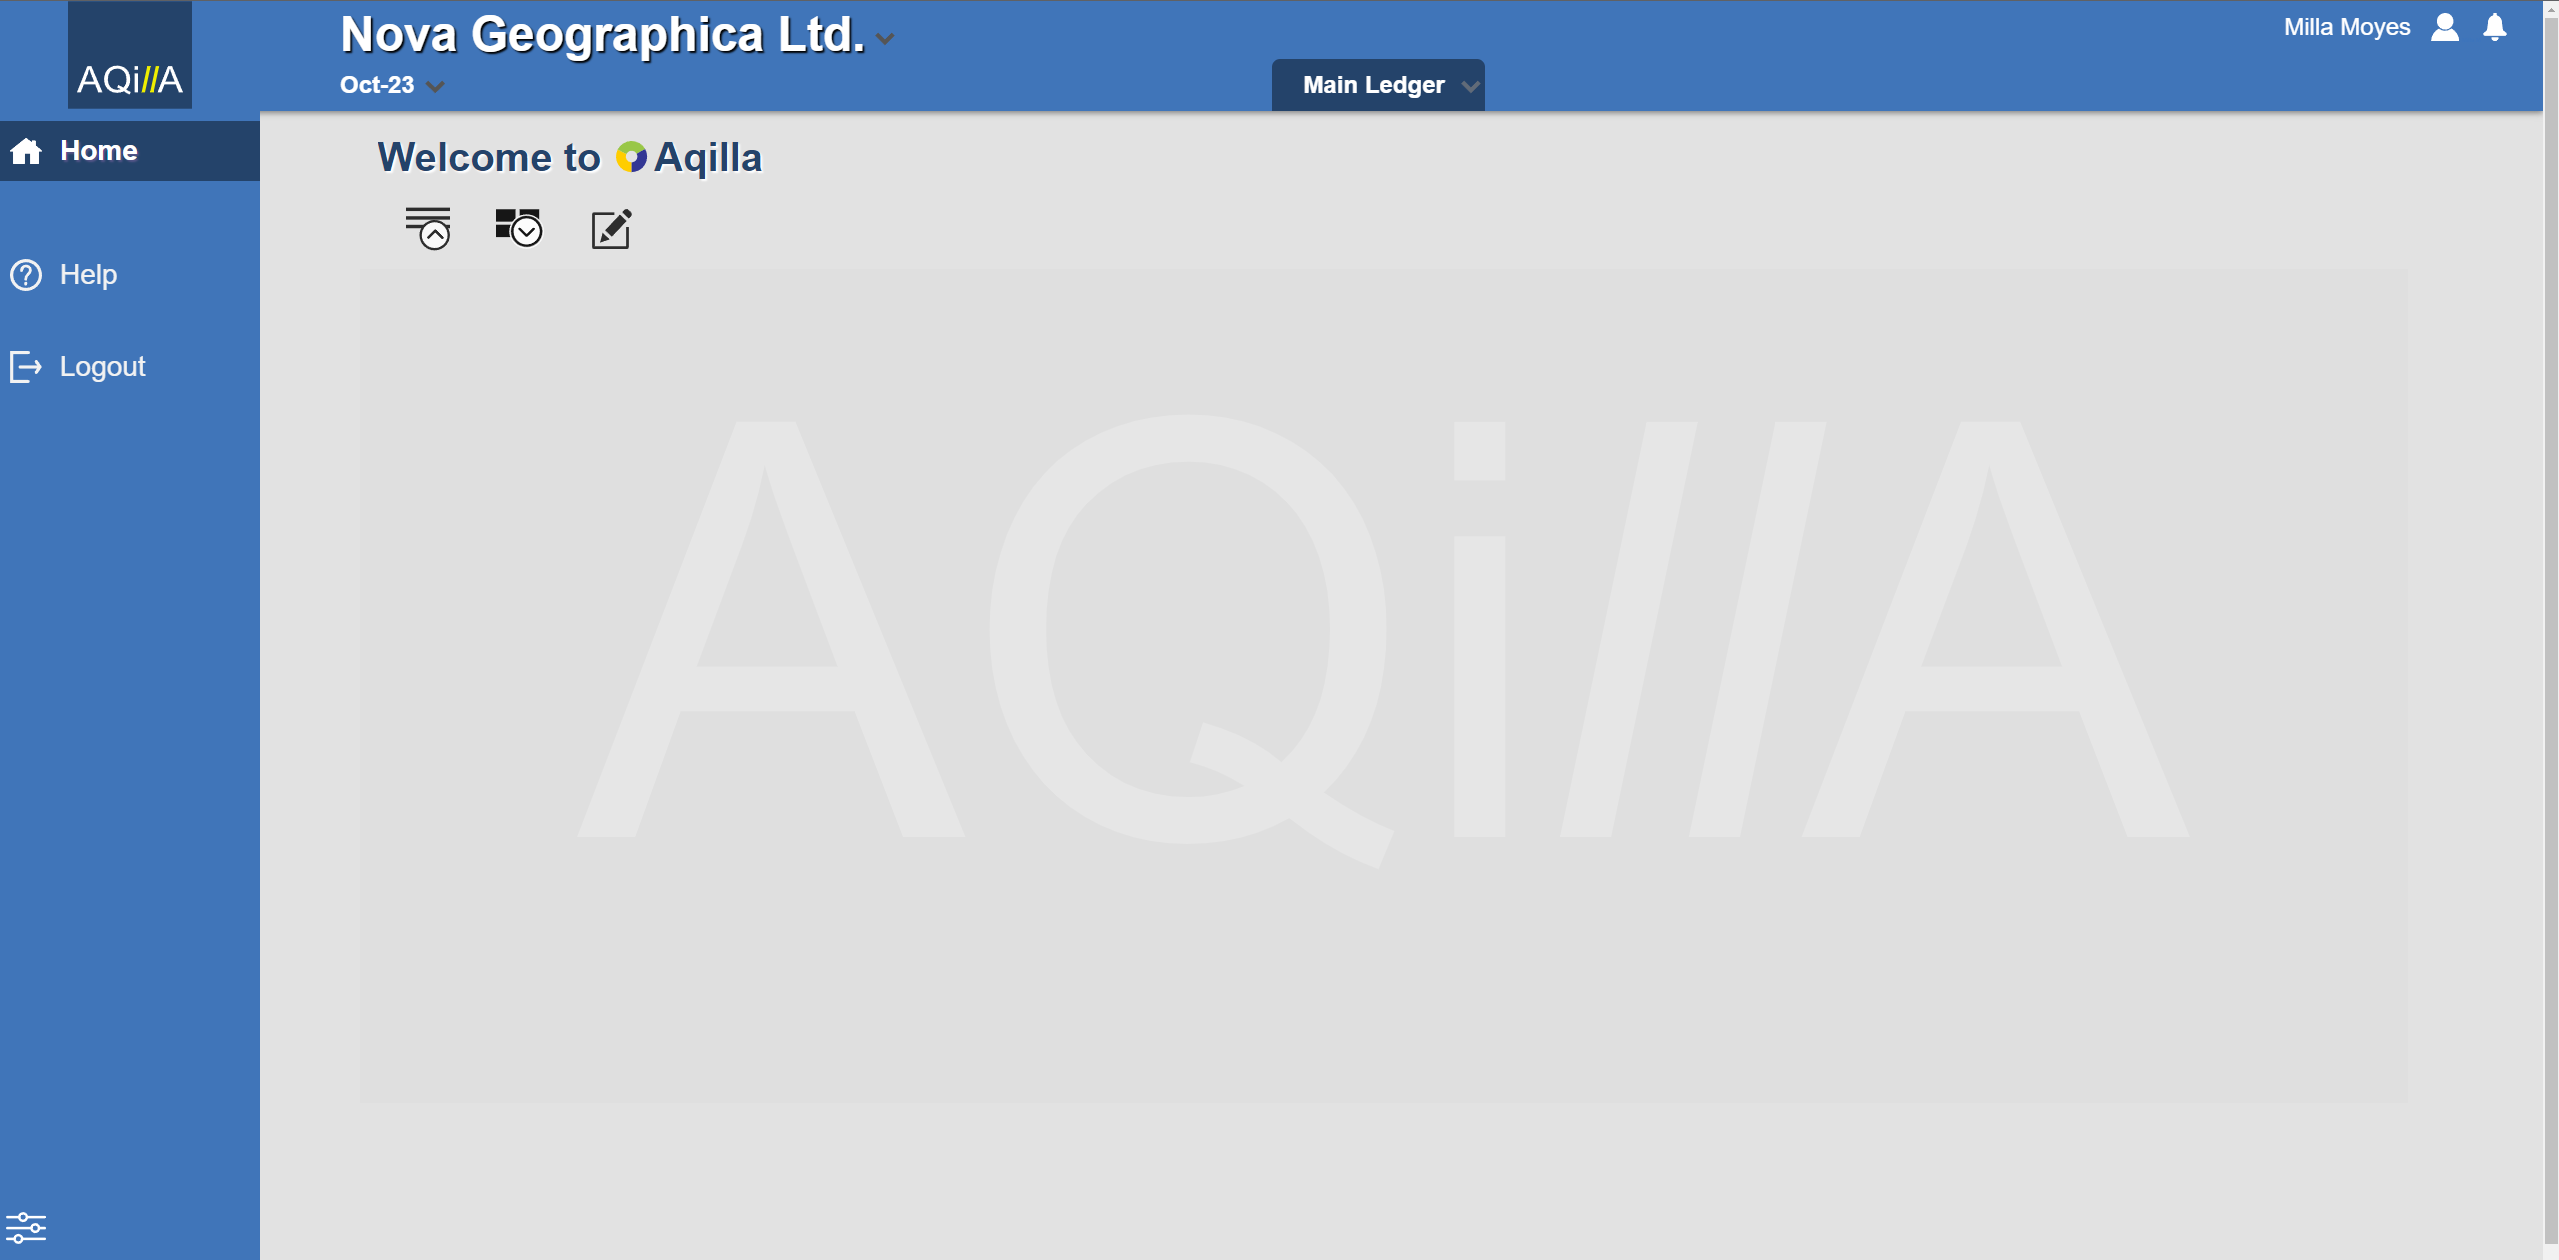
- When logged into the new Core User (Milla), the dashboard empty and they have very limited access to the the system.
- Now in this case we need to to provide access and enter Purchase Orders and Purchase Invoice documents. This will be done via Workflow Groups.
| |
|---|
- Before the user can have permissions in Workflow Groups, they need to be assigned a Role to have access to parts of the system.
- To assign a Role, the Professional User (Tim) will first head over to Reference > Personnel.
- From the list of users, find the new Core User (Milla) and select User Details on the the far right column.
| |
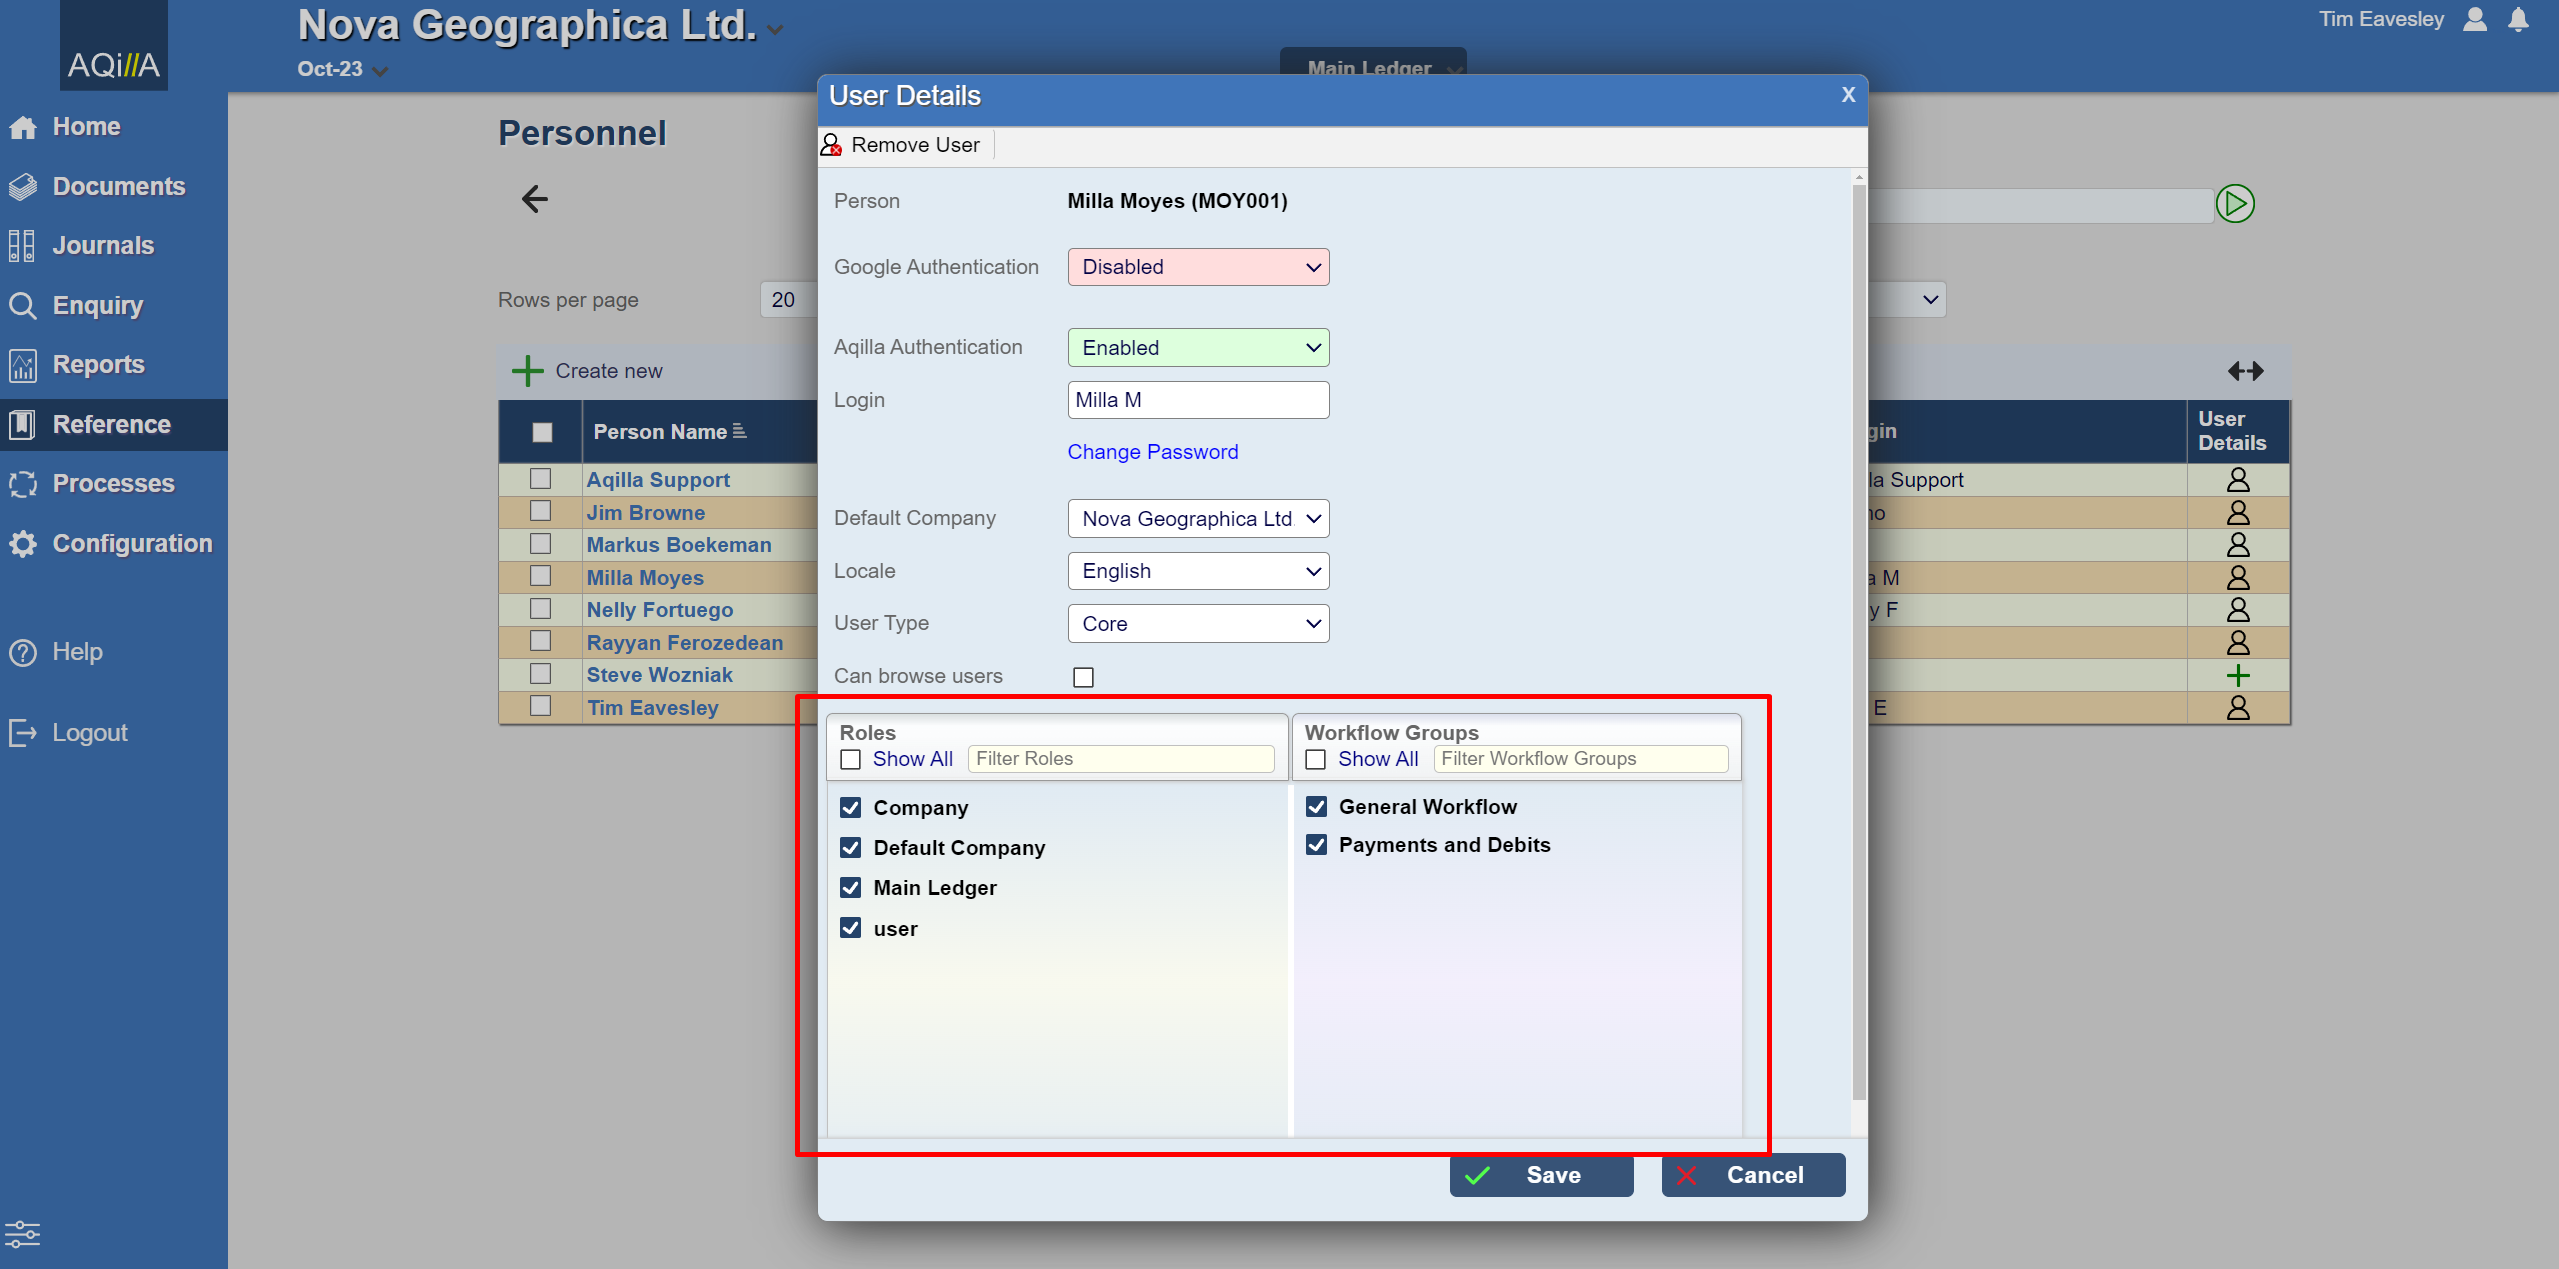
- The User Details window will pop up.
- Under the Roles and Workflow Groups sub menus
- A User Details window will pop up.
- Roles and workflow groups can differ from instance to instance.
- By Default on a new Core user they will have Role access to Company, Main Ledger & User
 | NOTE: Please do not uncheck company and ledger roles as the users access will be non-functional. |
| |
- As we want Milla to be able to access and view documents on Purchase Orders and Invoices we need to enable Purchases and Purchasing administrator.
- To enable this or more roles, click on Show All. A list of all the roles are available, so for Milla's case we enable Purchases and Purchasing Administrator.
| The Roles may vary based on each company and the settings used upon implementation |
| By default Purchases enables Purchase Orders and Purchasing Administrator enables Purchase Invoices. Roles assigned to these document permissions can be changed/adjusted.) |
| |
- Now we need workflow permissions to allow Milla to add/edit the documents inside.
- So, head to Configuration > Workflow Groups, a Window will pop up showing the Workflow groups.
- By default, the view setting will show Workflow Group > Persons.
- To make viewing users easier, click Switch: Person > Workflow Groups
| |
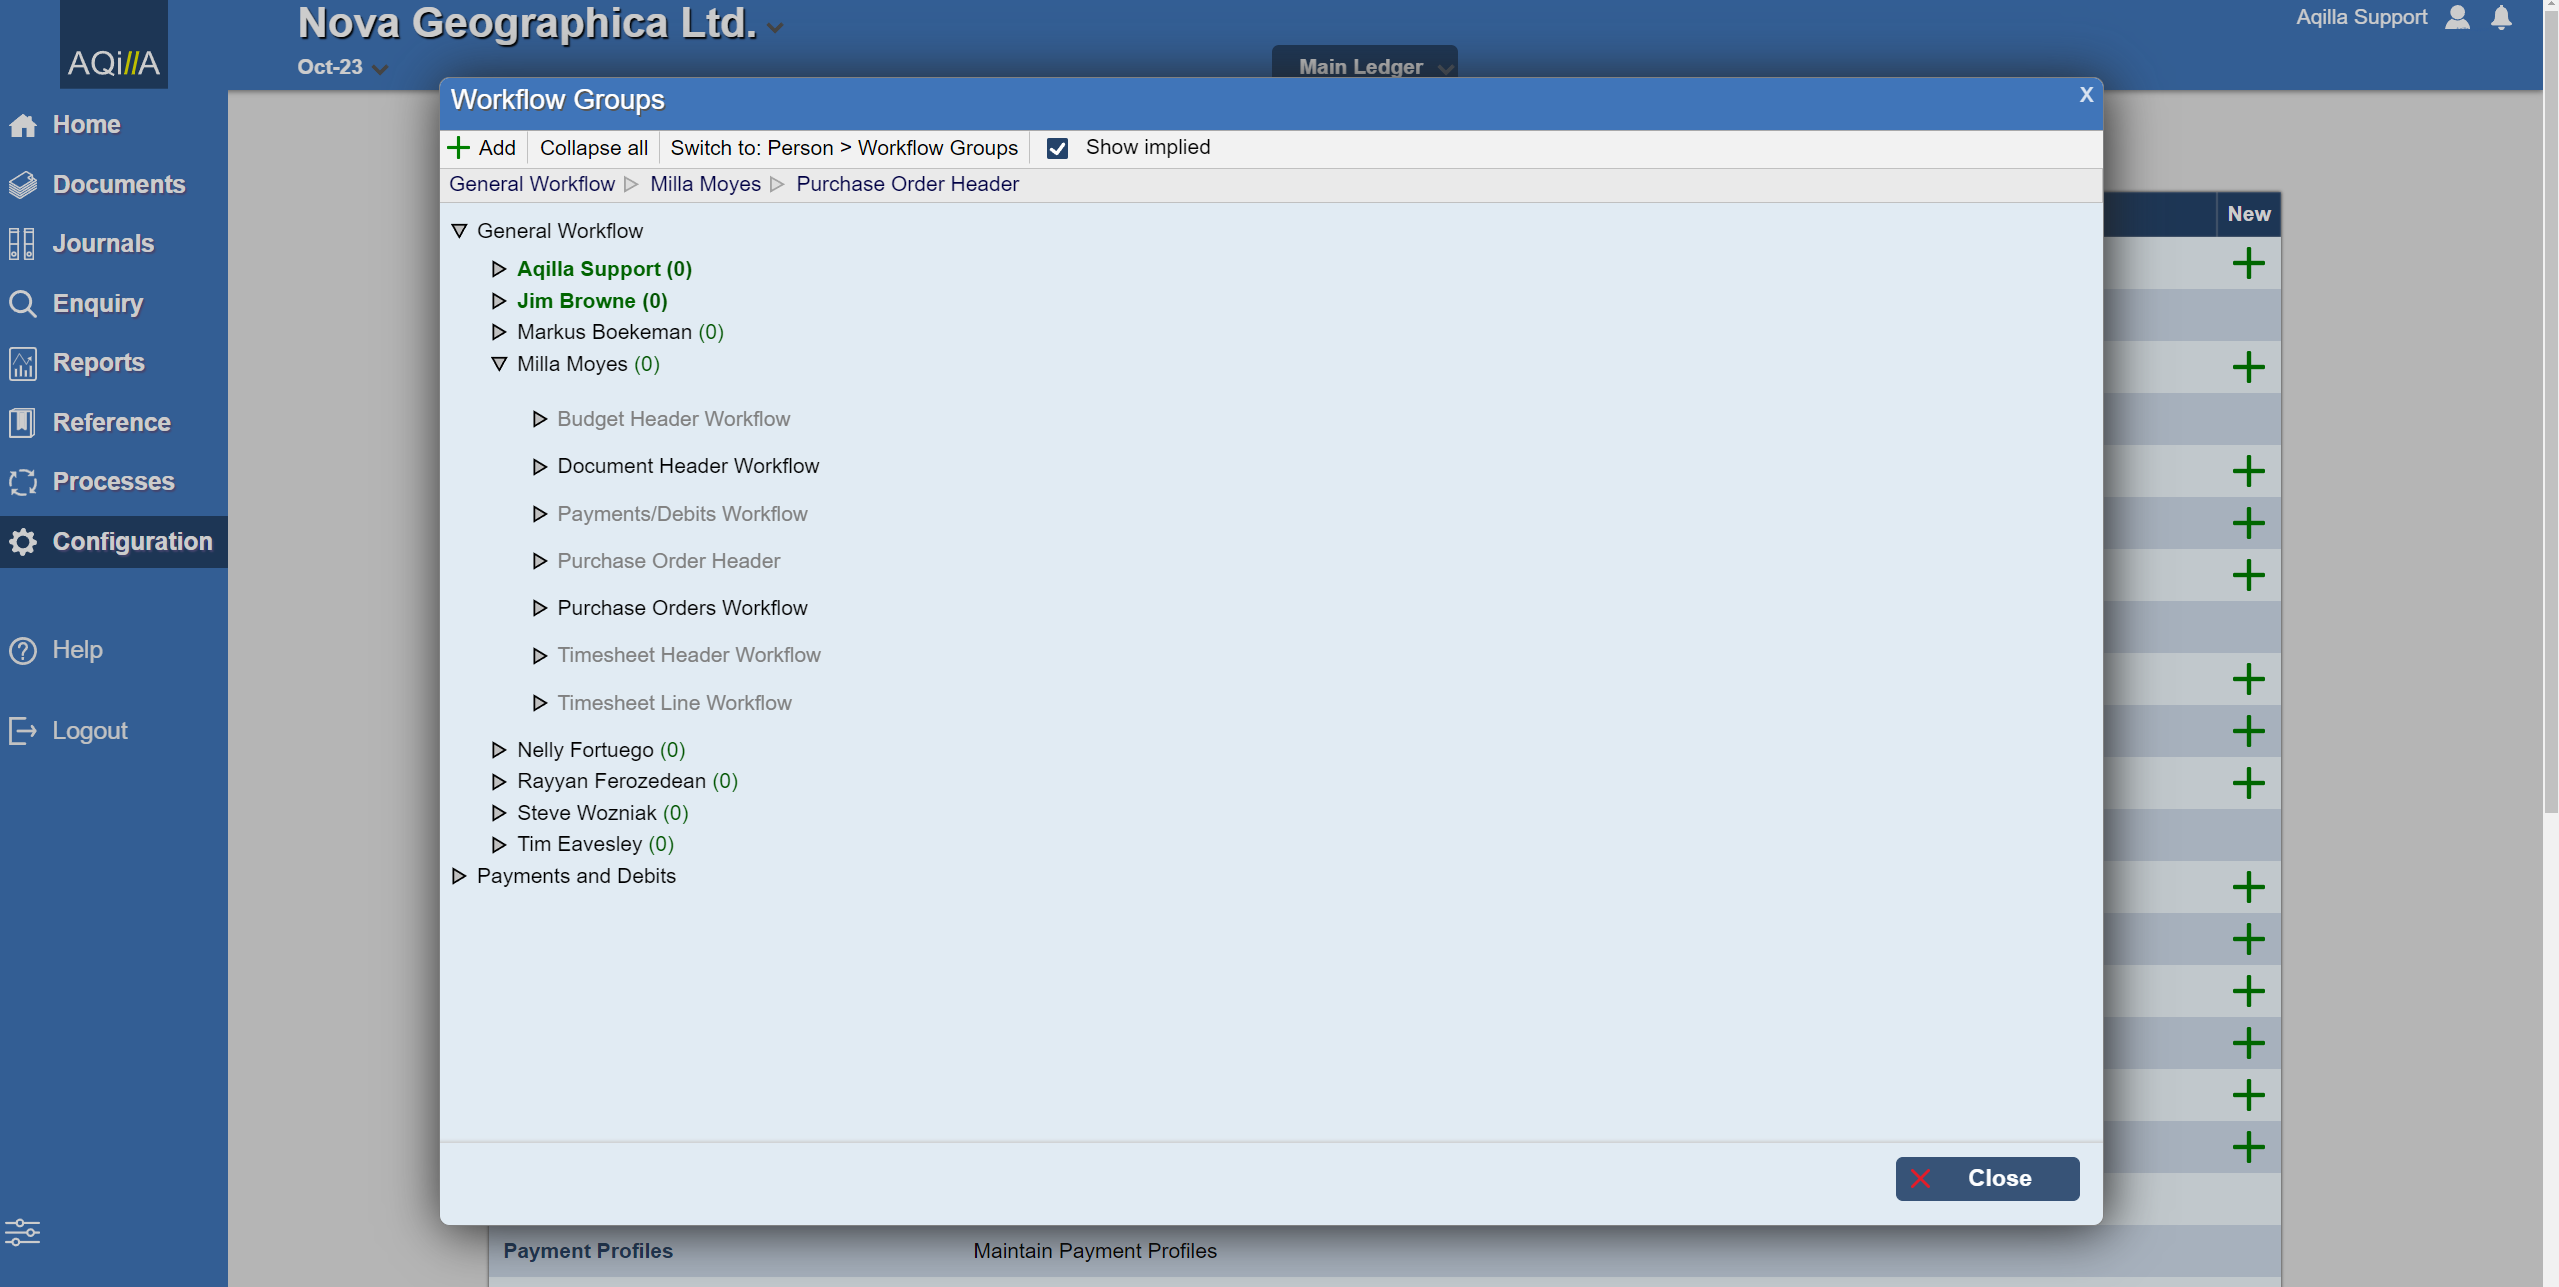
- Select the user you want to make changes for (e.g. Milla), and a dropdown list of different workflow headers will show.
- Select General Workflow.
- A drop-down list will show the different workflow headers, since we want Milla to have access:
- Purchase Invoices/Credit notes: Document Header Workflow should be active.
- Purchase Orders: Purchase Orders Workflow needs to be active.
(Note: The headers greyed out indicate they’re inactive)
| |
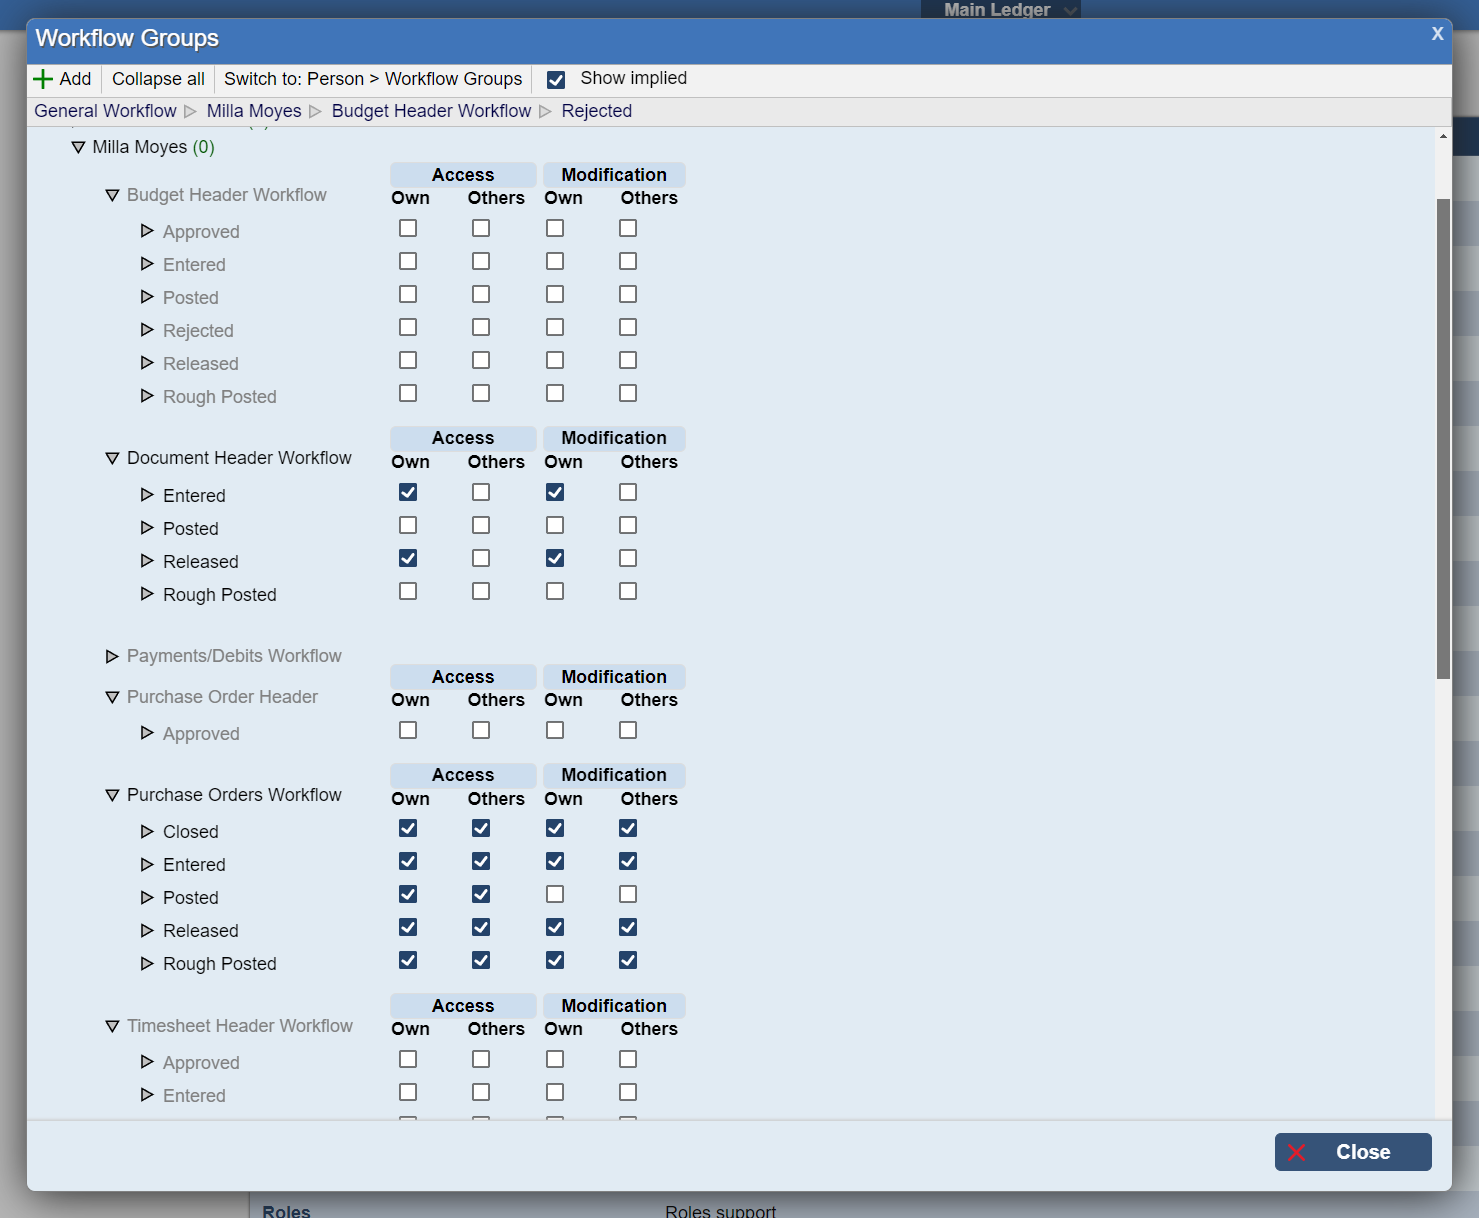
- When we expand the document and purchase order workflow headers, another drop down list will show with different permission configurations.
- These workflow permissions are there to control who can enter, release, approve and post a document.
- There are 2 primary columns: Access and Modification.
- Access: Having own access to view documents
- Modification: Ability to edit documents
- Within each column are sub columns: Own and Others.
- Own: Having own access
- Others: Other users can access your documents
| |
- When the permissions are enabled, right clicking them will expand and show transitions:
- Transitions are actions that a user can make after making a change to a document.
- (e.g., after entering a document, the user can have a transition of being able to release the document).
- The workflow functions (Entered/Posted/Released/Rough Posted) must be enabled to enable the transitions.
To explain: - Entered:
- Post: Enabling to Post the document after entering
- Release: Enabling to Release the Document after Entering
- Rough Post: Enabling to Rough Post the document after Entering.
(All three transitions can be selected and used back-to-back). - Released:
- Post: Enabling to Post the document after releasing
- Rough Post: Enabling to Rough Post the document after releasing.
- Rough Posted
- Post: Enabling to Post document after Rough Posting.
Rough Post: Enabling to Rough Post the document again after rough posting first time.
| |
- An example here with Milla's User (Core user) shows her making a Purchase Invoice Document.
- The workflow function ‘Entered’ is enabled to allow her to enter a new document.
And the Transition ‘Release’ under ‘Entered’ is also enabled, allowing the user to Release the document after entering (as seen with the button below the document line).
|

|
- If you plan to remove permissions from a user you can simply uncheck the boxes you wish to restrict access.
Ultimately if you want to remove the entire workflow permission, then you can hover over the Name (e.g. Entered) and a delete button will show. Click on it to remove the permissions overall.
| |
How to Copy User Permissions to Another User
In Workflow Groups you can easily copy permissions from one user to another.
Instead of manually enabling the permissions one by one, you can simply duplicate the permissions.
- In Workflow Groups you can easily copy permissions from one user to another.
- Instead of manually enabling the permissions one by one, you can simply duplicate the permissions.
|
|
|---|
In this example, we are going to copy the permissions Tim's user has over to Milla's User.
|
|
- In workflow groups you can see that Tim has access to more workflow headers than Milla (hence most of hers are greyed out)
- (Note: Most permissions are applied under General Workflow).
- When expanding each users Workflow Headers, you can see that Tim has more permissions to more documents in the system than Milla.
|
|
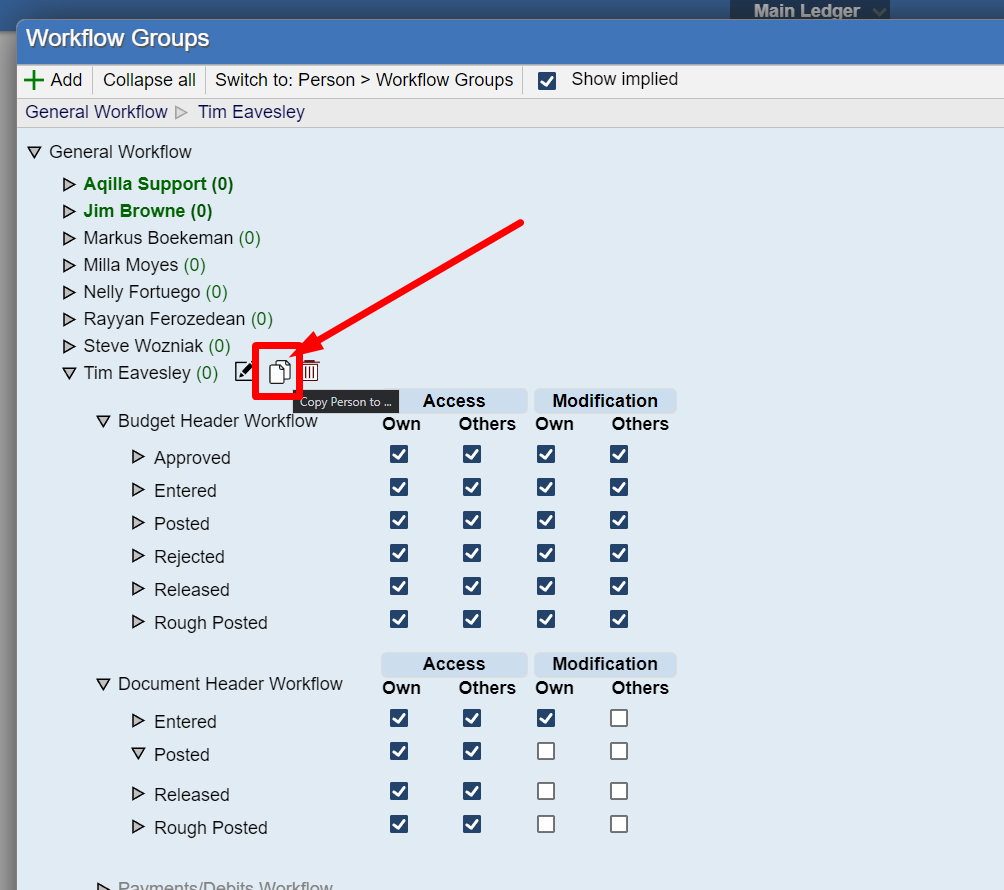
- To copy Tim's permissions to Milla's, you hover over Tim's name and will see three icons pop up.
- Select the copy button in the middle and a new 'Copy Person to …' window will pop up.
|
|
- You may have a blank box by default so first check mark 'Show Existing Members'.
- Then you'll have a list of existing users who are active on Workflow groups. Select Milla's user from the list.
- And then click 'Copy', and the changes will come into
|
|
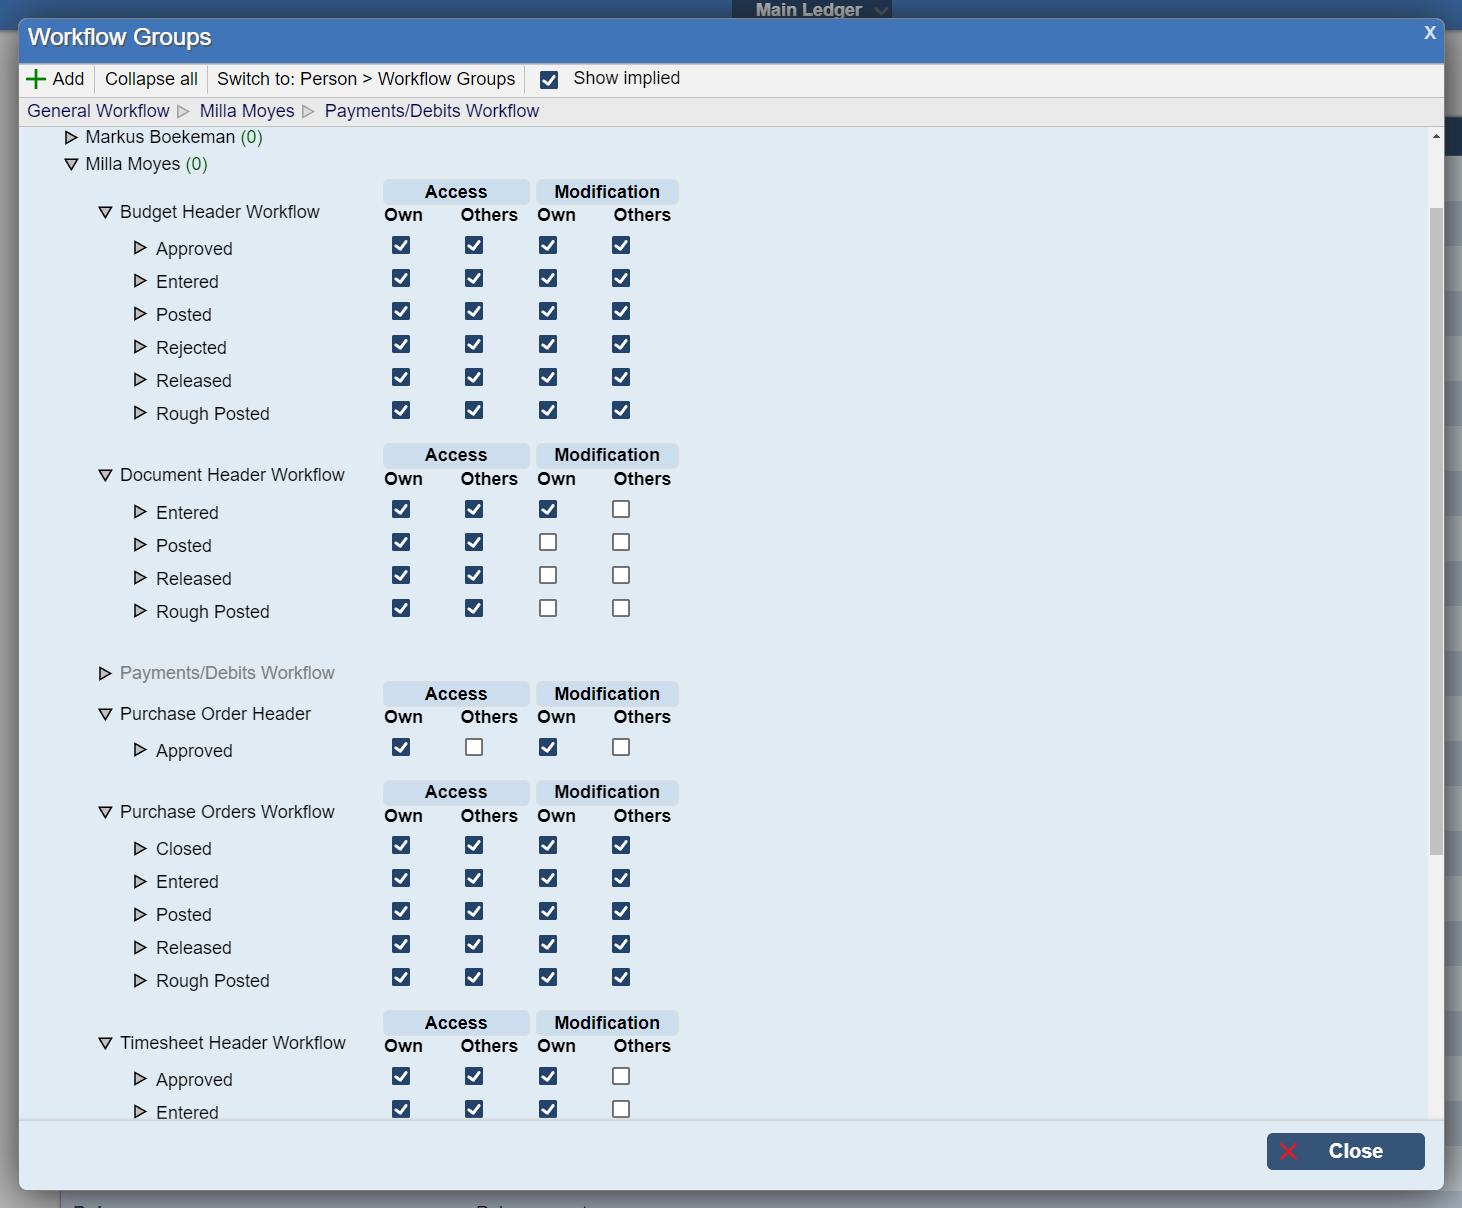
You can see the updated changes now when you look at Milla's workflow permissions.
|
|
|
|
Contact: support@aqilla.com or phone:+44 (0)20-3150-3843
|